Showing posts with label DIY. Show all posts

Thursday, May 7, 2015

Sweet Rose Glitter Soap


Mother's Day is coming up this weekend and I wanted to share a fun and easy gift idea. Whether you are creating your Mom a Mother's Day gift basket, or are looking for something your kids can help make, this Rose Shea Butter Soap is a very easy and fun project to create.

I already have my daughter hooked on helping me make soap. This time around we decided to make a decorative rose soap, with rose scent, pink soap coloring and a little glitter.

Yes, she was most excited about the glitter.


If you are new to soap making, you can find all the necessary supplies at your local Michael's or on Amazon. Here is what I used:


Rose Glitter Soap

You Will Need:

  • Shea Butter Soap Base
  • Soap Colorants - Pink
  • Soap Fragrance - Rose
  • Iridescent Glitter
  • Rose Soap Molds
For my soap mold I used 10 - 1 gram cubes, separated and placed in a microwave safe dish. I microwaved the base on high for 30 seconds, then 15 second intervals until melted. Stir in between each heating.


After the base is melted, add color drops and fragrance. Add a few drops of pink and stir, repeat until you reach the desired shade. I used 7 drops of rose fragrance for my whole batch. 

Before pouring into the molds, I dusted the bottom of the mold with glitter and added another tablespoon to the soap mixture itself. Pour into the mold and cool and set for about an hour.

To remove, invert and gently apply pressure to the mold. 

Store in a cool, dry place and enjoy! 


Wouldn't this make a great Mother's Day gift? Add a bouquet and you are set to earn major brownie points this coming weekend.



Andrea
Pin It

Monday, March 9, 2015

Creating Labels with Sketch Pens - March Silhouette Challenge


Last week I shared my recipe for this luxurious Green Tea Sugar Scrub. Today I want to share how to use your Silhouette and Sketch Pens to create an easy label. You will find even more inspirational posts for this theme at the bottom of this post. Be sure to check them all out.

This month's Silhouette Challenge theme is Word Art/Typography and the added challenge was for the Sketch Pens, which I already love!  Last year I created an inspirational Ballerina drawing with sketch pens for my daughter. She loved it! That was my first attempt with the pens and this time around I was more confident in how they work.

To make my labels I used Silhouette printable white sticker paper and the set of 24 sketch pens.

I actually first tired using the sketch pens on silver foil to make my labels, but the ink didn't stick to the slick surface. Sketch pens work very well on regular paper or a more porous surface.

Since I used the Silhouette brand sketch pens, I didn't need any special holders. All you need to do is take out the cutting blade, and these pens will slip right in.


When using sketch pens, be sure to get them started on scratch paper before trying to print out your work. I found one or two pens that needed to get the ink flowing or had a bubble in them. So try them out before slipping them into your Silhouette machine.

 I started with my wording. I wanted two different colors, the main name in black and the other script in green. This means when I set up my project, I put the words in different layers.

Why layers? Well, you will be working with one color at a time and afterwards I still wanted my cut lines available. This means I used 3 layers and could send each layer to the machine one at a time, changing out the pens or blade as needed.

The red highlighted words show where I planned to use my green sketch pen.


After sketching out the lettering then I turned off those layers and selected the outer cut layer. I inserted my blade back in the machine and selected the Silhouette Printable White Sticker Paper for blade depth suggestions.


I love using the sketch pens on projects like this because I have had numerous headaches with print to cut and registration marks. Sometimes it is fun to have another option.

You can also use non Silhouette brand pens in the Silhouette machine, I just ordered a set of pen holders so I can explore that option. The possibilities really are endless!

Want the recipe to make your own Green Tea Sugar Scrub? It is even easier than making the labels. And weren't those easy? Check out my Green Tea Sugar Scrub post.


But it is even better with the fun Sketch Pen label . I think this make a great Mother's Day gift. Or what about a fun green treat for St. Patrick's Day?

Want to Check Out More Silhouette Projects?

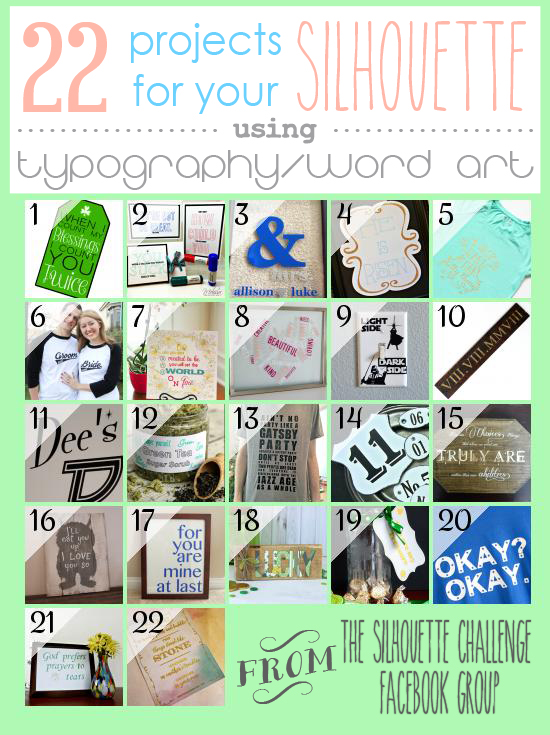
My Silhouette Challenge buddies and I are all sharing projects on our blogs today, so peruse the projects below for a wealth of Silhouette inspiration!

St. Patrick's Day Gift Tag with {FREE Cut File}The Fine PrintMr. and Mrs. Word ArtHe is Risen Easter Silhouette ArtDIY "Make Pretty Things" Graphic TeeBride & Groom Baseball ShirtsUsing Sketch Pens (and Markers!) For BeginnersHeart Shaped Vinyl Word ArtStar Wars Light Switch - Silhouette ChallengePallet Wood Roman Numeral Anniversary Signhow to cut LARGE Vinyl DecalsCreating Labels with Sketch Pens - March Silhouette ChallengeAin't No Party Like A Gatsby Party T-ShirtDIY Faux Enamel TagsHarry Potter Word ArtWhere the Wild Things Are Pallet Sign"At Last" Framed Vinyl Word ArtLucky Pallet SignSt. Patrick's Day Etched Glass Jar GiftThe Fault In Our Stars Inspired Shirt - Okay? Okay.Silhouette Craft Projects: Framed Irish ProverbSketch out an Inspiring Quote
1. My Paper Craze // 2. The Stamp Doc // 3. Peanut Life Adventures // 4. Creative Ramblings // 5. Pitter and Glink // 6. The Thinking Closet // 7. Single Yet Married Mom // 8. unOriginalMom // 9. Sisters, What! // 10. Where The Smiles Have Been // 11. From Whine to Whine // 12. Adventures in All Things Food // 13. Practically Functional // 14. Patina Paradise // 15. Please Excuse My Craftermath... // 16. Weekend Craft // 17. Two Purple Couches // 18. Ribbons & Glue // 19. TitiCrafty // 20. Simply Kelly Designs // 21. Confessions of an Overworked Mom // 22. Get Silvered
Andrea
Pin It

Thursday, March 5, 2015

Green Tea Sugar Scrub

This post contains an affiliate link, but no pressure. I order many of my supplies on Amazon.com and just want to share what I use for my projects. All opinions and experiences are my own.


This week's Thursday craft post is another fun and easy one! If you haven't tried making sugar scrubs, I highly recommend it. It costs just a fraction of the price of buying the special boutique scrubs and they add a little extra luxury to bath or shower time.

Today I am sharing a favorite of mine. This is actually a two-part post. Today I am sharing how to create this fun Green Tea Sugar Scrub and Monday I will share how to create you own labels with Silhouette Sketch Pens. Because these are fun to make for yourself, and to give to others.


Why green tea? Well I was thinking of a few scrubs that would be perfect for starting off my day. Two of my favorite things to start with are coffee or tea... green tea especially. Since green tea contains an antioxidant, polyphenols, it is not only good to drink, but also good for your skin.

I acquired a taste for simple green tea while living in Japan. During an internship in the Tokyo area, I took weekly tea ceremony lessons. Each week I enjoyed a frothy bowl of matcha. It has an earthy, slightly bitter flavor that I fell in love with.

To this day I still prefer my green tea without sweetener. But, for this scrub... I will make a sugar exception.


This recipe uses both loose leaf tea and a little matcha (green tea powder). The Matcha helps to add a little green just perfect for around St. Patrick's Day.


This recipe only calls for 5 ingredients, but the Vitamin E oil is optional. If you plan to make your own bath salt, scrubs or soaps it is a nice thing to have on hand. I love adding it to my skin products.

Green Tea Sugar Scrub

You Will Need:
  • 1 c. sugar
  • 1/2 c. coconut oil
  • 1 Tbsp. loose leaf green tea (3 tea bags is about a tablespoon)
  • 1 tsp. matcha (green tea powder)
  • 1-2 tsp. Vitamin E oil
Mix all ingredients together until well combined in a medium bowl. If your coconut oil is solid, soften in the microwave at 30 second intervals. It shouldn't be hot, you don't want to melt the sugar, but it should mix into the scrub. Place finished scrub in an airtight container. This scrub will last 2-3 weeks. The Vitamin E oil helps as a preservative, but I don't suggest storing homemade scrubs for long periods of time. They are meant to be made and then enjoyed.


 I like to make a double batch to fill a 16 oz. jar. I purchase mine on amazon - Clear 16 oz Plastic Jar Black Lid 4 pk with Mini Jar , but any airtight container will work.

If you enjoy this sugar scrub, please check out my Lavender Sugar Scrub post, too!


Andrea
Pin It

Friday, December 19, 2014

Taking the Planes Characters on the road this Holiday Season

 This holiday travel shop with Disney Planes the Movie has been compensated by Collective Bias, Inc. and its advertiser. All opinions and experiences are mine alone. #PlanesToTheRescue #CollectiveBias


We usually don't travel around the holidays. In fact, the longest holiday drive we take is about 15 minutes. We live surrounded by multiple generations of family, so keeping my kids occupied in the car is usually not an issue. This year though we have a little surprise in store for the kids.

We will be packing up the family to go on a special North Pole bound train ride and I know the kids are going to have a blast. My only concern is to get to the station is an over 3 hour drive.. and I have 3 small children to keep entertained for the entire way there.

I like to be prepared, so while picking up some car ride essentials at Walmart, I took a peek down the toy aisle. 


The die-cast 3-pack, Secret Hangar Meeting, is currently on Rollback at Walmart, along with several other great last minute gift ideas, or "car ride boredom busters". My children are huge fans of Disney Planes and Planes Fire and Rescue, so I knew this would be a big hit.

I have fond memories of driving my own die cast cars around the back seat of my parent's mustard yellow Matador during family road trips.


The cute Disney characters inspired me to also create a No Sew Felt Board or Flannel Board for my daughter who loves to create her own. Dusty and his friends from Planes would be my inspiration.


To get started, you will need:

  • Foam Core Board
  • X-Acto Knife
  • Ruler
  • Scissors
  • Felt, in various colors
  • a collection of ribbon, washi tape or lace 
  • Felt Glue
  • Hot Glue Gun
  • Freezer Paper
  • Pencil
  • Assorted Permanent Markers
I started by cutting foam core board. I wanted my felt board to be like a book, small enough to fit in my daughter's lap in the car, but big enough to tell an entire story. In the end I cut my cover pieces to be just larger than a 9" x 12" sheet of felt. I allowed for a 1/2" around the edges so cut them to be 10" x 13".


Then with glue, I started putting down my felt for the storyboard. I went with a solid blue sheet on one side for the sky. 

Now is when a stash of ribbon, lace and washi tape comes in handy. I glued red striped ribbon over the page edge and then "finished" the edges of the felt with strips of my choice. I went with a typeset alphabet and metallic ruler tape for this part.


On the other side of my felt board I created a sky and mountain backdrop. I wanted the felt back for this project to be smooth, so I inset the mountain then glued it all down. This will be perfect for staging the woodland fires for my daughter's stories.


I made a simple "binding" for my foam core book with extra wide ribbon. This part I attached with hot glue for added durability.

Then I finished the outer edges with a little bit of lace.


On the outside of the Felt Board I used adhesive washi sheets for quick covers.

Then it was time to start on the removable felt pieces for storytelling. 

One of the easiest ways to cut felt for an intricate project like this is to use Freezer Paper. I found these cute flames online. I printed them out and taped them into a window for easy tracing. Then I covered them with a sheet of Freezer Paper (wax side down) and traced.


Then on a low setting, I ironed the wax side down onto a piece of red felt. It doesn't take long for the paper to stick and the stencils are reusable with a little more heat.


Using Freezer Paper makes it really easy to cut out simple shapes and designs. I tried cutting these little flames freehand, but this is much better.


To complete my little Fire and Rescue scene, I cut out more flames, trees, clouds, a smoke jumper and parachute, Dusty and another generic plane.

The best part about a project like this is we can keep adding felt characters and pieces to our collection and my daughter can use it over and over on our car trips as well as at home. I would point out that this is a nice and quiet car activity, but we all know the kids will be supplying the sound effects, right?


And it is so much fun to have more adventures with Disney Planes Dusty and all his friends.


So if there are young children and car trips in your future this Holiday Season, or maybe just are looking for a last minute gift idea, think of creating your own personalized Felt Board with a Disney Planes theme, or stop by and stock up on these great Planes toys currently on Rollback - Disney Planes Flight to the Finish Speedway Rollback to $24.97, Disney Planes Fire & Rescue Die-Cast Vehicles, 3-Pack Rollback to $14.97, or Disney Planes Fire & Rescue Deluxe Talking Vehicle Assortment Rollback to $19.97.

Either way, you will be a big hit this season with the kids.


Do you have any long car trips over the Holiday Season? How do keep everyone entertained?

Andrea
Pin It

Thursday, August 7, 2014

DIY Lavender Sugar Scrub


I used to pamper myself.

A large portion of my disposable income used to be spent on things like waxing, scented lotions and other items that served no other purpose than to make me feel good and pretty.

Now, fast forward about 13 years... I am desperately trying to stick one wayward curl behind my ear. It escaped from a haphazard ponytail. My glasses are smudged after being grabbed by a one-year old, I haven't had a shower today and you probably guessed it, I am sans makeup as I type. As opposed to having ever scent available from Bath and Body Works, now I might have a random tube of lotion... somewhere.

In other words, pampering has ceased and I could use a little pampering about now.


With a family of 5 though, who has the money to shell out for expensive lotions, boutique scrubs and other girly treats? Not this mama. Luckily, making an at home sugar scrub is super easy and very inexpensive. As I start playing around with scents and combinations, I will post those recipes as well. Today I have a simple, natural and amazing smelling Lavendar Sugar Scrub to share.

You Will Need:

  • 3 Tbsp. lavender blossoms
  • 1 1/2 c. sugar
  • 1/3 c. coconut oil
  • 2 Tbsp. grapeseed oil *optional, you could also use more coconut oil
  • 1/2 tsp. vitamin E oil
  • 5 drops lavender essential oil
Mix all the ingredients together with a spoon or spatula. Store in an airtight container like a mason jar. Use whenever pampering is called for.


I created this recipe to be both gentle and nourishing to my skin. Summer leg care often leaves my skin dry, so the coconut oil, grapeseed oil and vitamin E will help with that. You can change the formula to fit what works for you and what you have around the house. I chose to use both lavender blossoms and essential oil. You could definately use one or the other.


Andrea
Pin It

Thursday, July 24, 2014

DIY Succulent Garden - Kids Create #TBCCrafters


Succulents are all the rage right now. Have you seen them on Pinterest? Etsy? in Magazines? Well, they are also fabulous plants for kids. They don't require much water, they grow slowly and are very resilient. We decided to set up our own little succulent garden.

We opted for a shallow clay pot  base since terrariums often create too much humidity for the plants. They like to be in the open air and do not do well with too much water. Our solution was shallow and with a nice layer of gravel to keep the roots watered but the plants dry.


DIY Succulent Garden

You Will Need:

  • 1 large, shallow pot.
  • assorted small succulents
  • good potting soil (ours contained a large amount of vermiculite for good drainage)
  • gravel
  • figurines *optional

Fill the dish just below the rim with potting soil.


Arrange the plants, dig small holes and fill in around the plants with more potting soil


Cover the dirt with a layer of gravel. Water the plants well to allow the dirt and gravel to shift and settle.


Then decorate with figurines or small toys. My daughter helped decorate the garden and insisted that her bunnies nibble on the succulents. Now my kids can water their plants weekly and re-arrange their bunnies as often as they want.

Simple and fun. Now my kids have their own succulent garden and it cost a fraction of the pre-made succulent planters in stores.


Andrea
Pin It

Tuesday, June 10, 2014

Creating Summertime Memories with DIGIORNO and DIY Paper Pinwheels

I am a member of the Collective Bias®  Social Fabric® Community.  This shop has been compensated as part of a social shopper amplification for Collective Bias and its advertiser. #SummerGoodies #CollectiveBias


This year Summer has taken on a whole new meaning for our family. It is no longer just the hottest season of the year, it is the start of something, the end of something. My son will be home and next year he will be going to school for a full day. My daughter will be heading off on the bus this Fall so this is my Summer to enjoy them and for all of us to create memories together.

Friday starts our break and my little adventurers have big plans for the long Summer days. Armed with explorer vests, binoculars, magnifying glasses and bug vacuums they want the chance to explore the backyard and their world.


You better believe I want to be out there experiencing it with them. My daughter is completely enthralled with lady bugs, roly polies and caterpillars right now. It reminds me of my own backyard exploration at her age. 

My goal for this Summer is to get outside, have fun and spend a little less time in the kitchen. I headed into my local Walmart to stock up on quick family meal options to help me out.


Pizza is a fun antime food, but it is great for those lazy Summer days. And if I don't want to make the house hot, I can always throw a pizza on the grill outside.

The truth is, I would rather be out savoring summertime than worrying about dinner.

I enjoy the oven ready DIGIORNO pizzas because they are easy to prepare and come in a variety of flavors and crust options. This time around I wanted to try the new DIGIORNO® Design A Pizza™ Kit and also pizzeria! from DIGIORNO®. I am already a fan of the DIGIORNO® RISING CRUST® Pizza.


I enlisted my kids to help me make lunch the other day. the DIGIORNO® Design A Pizza™ Kit came with everything we needed to customize our own pie. With pepperoni, chicken, onions, extra cheese, seasoning and more my kids used every last item in the box.

They were especially excited to tell Daddy that they made the pizza themselves!


Pizza is something the whole family can enjoy and clean up is simple. It is a great way to refuel and get back outside for more fun.

I really enjoyed trying the new pizzeria! from DIGIORNO®. I picked up the new Tuscan Chicken and it reminded me so much of the specialty pizzas I used to order in the city. Great ingredients, grown up flavors but at a reasonable family price.


And being a year old, this was the baby's first pizza. Now isn't that a fun memory to make? I cut his slice into bite-sized (or finger friendly) pieces and let him explore and enjoy it. Finally this kid has enough teeth to show the crispy crust who's boss!


Another memory we all made together was with these homemade pinwheels. Everytime we go to Walmart my kids beg me to buy them the shiny pinwheels on the end-caps. I don't know how many of those things we have smashed, broken, lost or torn. Making our own was not only easy, but it was a lot of fun to customize them ourselves. 

So just in time for warmer weather and Independence Day we made patriotic pinwheels. You will just need a few simple supplies.


DIY Paper Pinwheels

You Will Need:
  • scrapbook paper in various colors and patterns. Cut 2, 5"x5" squares
  • coordinating circle 
  • pinwheel template (print out)
  • scissors
  • hole punch
  • Elmer's glue dots
  • bendable drinking straws
  • pencil
  • 1 1/2" brad

Use the template to cut out your paper square, with notches and circle. Punch a hole in the center of your square and where indicated on the pattern edges. Also punch a hole in the middle of your circle. Glue the scrapbook paper together placing the top sheets diagonal to each other so the edges do not meet, but the center circles are alligned. With a pencil, curl the edges of each strip towards the center. 

Start with one peice, carefully lining up the holes, and going around the circle in order, glue one peice on top of the next. You will start to see your pinwheel taking shape. Then glue the circle cut-out on top, again lining up the center hole. 

Bend the flexible straw. Coming from behind your pinwheel pushing the short end through both the hole in the back and then out through the layered peices. If there is any resistence, use your scissors to gentle widen the punched holes. The paper needs to be able to turn freely on the straw.

Take a brad to seperate and flare out the ends. Push this through the front of the straw. By bending the brad, it will push out on the sides of the straw holding it into place. You can add a little glue to the end, if you wish.

Hold you pinwheel at a slight angle and blow. These are great as kids' toys or for festive decorations around the holiday.


So whether you plan to catch some bugs, makes paper pinwheels, or just enjoy a good Summer book on your Kindle, do yourself a favor, stock your freezer and worry less about dinner and more about savoring Summer.

'Cause you know Summer will be over before we know it...


Looking for more great meal or dessert ideas? Check out Nestle's Flavorful Moments.

Which DIGIORNO pizza is your favorite?

Andrea
Pin It