Showing posts with label Good Cook Blogger. Show all posts

Tuesday, June 24, 2014

Did Someone say, Fresh Fruit? Pavlova Recipe to Celebrate Summer

 I am part of the Good Cook Blogger Program and received these products for review. All opinions and experiences are my own.  #‎goodcookkitchenexprt‬  #freshfuitbowl  #BBBProduct


All Winter long I dream about Summer and the fresh fruit I can enjoy while the weather is hot. Here on the farm we have a lot of fruit growing near the house. There is the strawberry fields, cherry orchard, and acres of blueberries. Just a short walk away is even more options like peaches and berries ripening in the sun.

To say we eat a lot of fruit would be an understatement.

My husband's favorite by far would be the melons. He grows a mean patch of canteloupe. I, on the other hand, look forward to picking out the first watermelons of the season from the field.

Usually I rinse, stem or slice and then we devour. Not because we want to, but knowing that the sweet and plump fruit that ripened in the sun will soon start to get mushy or weepy after just a few hours. But, I just got a new bowl set from Bed Bath and Beyond, a Good Cook 3-Piece Pro Fresh Cut Fruit Bowl.


I have fallen in love with it's versatility. Perfect for U-pick strawberries, draining frozen cherries and reserving the juice, or even storing cut fruit. An inner red bowl allows the fruit to drain and not sit in it's own juices. The green bowl holds all the liquid in, with easy to grab handles and a useful pour spout. Remember I mentioned saving the cherry juice for thickening to use in fresh fruit pies? The third peice is a lid to keep everything safe for your next picnic or family reunion, or while storing in the fridge.

You can find these handy fruit bowls exclusively at Bed Bath and Beyond.


Deciding on a recipe to show off fresh fruit was easy! I wanted to make a Pavlova.

Have you every tried Pavlova? Originally a New Zealand confection made to honor the ballerina Anna Pavlova, it has spread and become equally as popular with Australians. A simple and lightly sweetened baked meringue topped with sweetened whipped cream and top with fresh fruit of your choice.

Begin by making some guides for the meringue. I grabbed a round container about the size I wanted and traced it onto a sheet of parchment. Flip the parchment over and you have a place for your meringue.


It's meringue and what would that be without eggs? It is easiest to create a meringue with room temperature eggs. Then get crackin' and get them separated.

The yolks will be a little left out. Might I suggest a custard? Or homemade ice cream?


I let the stand mixer do all the heavy lifting....

Then add in the lemon juice and other ingredients. Again, whip it good. (Na, na, na, na, na!")


You can whip out a pasty bag or ziplock if you prefer, but I am fine and dandy with a big spoon. Meringue doesn't bite. Shape it to your circles and then use the back of a spoon to make a little hollow in the center of each one. This will be where the whipping cream and fruit go.


I should mention that the only other time I have had homemade Pavlova, my Mom made it. She didn't make these little mini versions, but a giant full baking sheet sized circle. It was quite impressing... and took a REALLY long time to dry properly. Meringue that hasn't dried all the way will become chewy. No good. Properly dired Pavlova will come away from the parchment easily and be very brittle and light.

See directions below on baking and cooling. The most fun part, of course, is topping. I like mine with a wide assortment of seasonal berries and then I blended up a little sweetened mango puree to spoon over the top.

Fabulous! The perfect way to enjoy fresh cut fruit.


Pavlova

You Will Need:

  • 3 egg whites, at room temperature
  • pinch of salt
  • 1 1/4 c. sugar
  • 1 tsp. lemon juice
  • 1 tsp. Princess Cake & Cookie Emulsion (or vanilla extract, if you prefer)
  • 1 Tbsp. cornstarch
  • 2 Tbsp. confectioners sugar
  • 1 1/4 c. heavy cream
  • 2-3 Tbsp. confectioners sugar
  • 1 tsp. vanilla bean paste
  • 1 mango
  • 1 - 2 Tbsp. water to achieve pourable consistency
  • seasonal fruit, sliced

Preheat the oven to 250 degrees.  Draw 4 circles on a sheet pan cut parchment. Turn the parchment over.

In a stand mixer, whip the eggs with a pinch of salt for 2 minutes. Then add the lemon juice and gradually beat in the sugar. Then add the cornstarch and flavoring. Beat for an additional 4 minutes on high until you achieve stiff peaks.

Using your parchment as a guide, divide the meringue between your circles. I used a large spoon to help even out the tops and go around the edges. Then I pushed an indent in the middle of each of my meringue piles. Sprinkle the tops with a little powdered sugar and bake for 15 minutes. Reduce the heat to 200 degrees and bake for an additional 1 hour 30 minutes. Then turn off the oven and let the meringues cool completely with the oven closed.

When the meringues are cool, prepare the whipped cream by beating the cream, vanilla bean paste and confectioners sugar together on high. Puree the mango and enough water to make the mango pourable.  Fill each meringue with whipped cream, top with fresh cut fruit and then drizzle with mango puree.

Serve immediately. Enjoy!

How would you top your Pavlova?



Andrea
Pin It

Thursday, May 22, 2014

Light and Cheesy Pasta Primavera and an Upcoming Kitchen Drawer Contest

 I am part of the Good Cook Blogger Program and received these products for review. All opinions and experiences are my own. #‎goodcookkitchenexprt‬ #KitchenDrawerContest


Every good cook has a drawer full of tricks, kitchen gadgets and recipes that save time, effort or both. Hungry crowds need meals to please and sometimes simple is best. I have several recipes and favorite tools that get a better work out than others, and this Light & Cheesy Pasta Primavera combines some of my Spring staples.

Yes, I was going for something simple, something that didn't leave me with a sink full of dirty dishes and little time left over for my family. I was going for something delicious and comforting. I immediately thought of pasta, cheese and the seasonal vegetables of Spring. And that is how this little twist on Pasta Primavera was born.


Fresh peas have made an appearance on the farm and this short window of time is always an exciting one. My kids are more than willing to both pick and shell peas for our meals. Even if you fancy yourself a pea "hater", you should give the freshly picked and freshly shelled legume a try. Sweet and bursting with flavor, they are nothing like the bland or tough version available the rest of the year.

So grab one-pot, a few simple ingredients and just a couple of tools to create a fun dinner tonight!

Speaking of kitchen tools...


First grab a can opener. Mine recently cut it's last can lid and I replaced it with this Good Cook model. This Safecut 4-1 Can Opener is my new drawer favorite. We tend to dull or break a can opener every few years and this model is very easy to use. It leaves a smooth cut edge on both the lid and can top and also serves as a cap twister, bottle opener and tab puller.

Anytime I can get multi-use out of a gadget, I am a happy Mom.

I chose to go with chick peas for this pasta to save me time and add in a good protein source while keeping this dish inexpensive. Seems like the price of meat just keeps going up, doesn't it?


Then since all the action is going on in one big pot, grab yourself a Utensil Pot Clip. This is a new item in my kitchen drawer and it has already saved me from a lot of drips and dribbles on the counters and around the stove. Even with the rim of my pot, the clip held and was a convenient way to keep my cooking spoon handy.

As a Mom who cooks for more than one dietary need in the family, I was thrilled to have a clip. This is a great and easy way to keep all my stirring spoons separate and prevent cross contamination from low-pro and regular dishes.


Another fun item to note is this Double-Sided Flip Measuring Spoon. Have you seen these? As opposed to having a drawer full of loose measuring spoons to sift through, this spoon combines a 1/4 tsp., 1/2 tsp., 1 tsp. and 1 Tbsp. measure that you can just "flip" to the correct size. I am going to deem this the ultimate in travel gadgets and would love to see these in vacation homes.

Have you ever stayed somewhere that boasts a fully stocked kitchen to find that some of the measuring spoons are conveniently missing? And of course you really need those?

Yeah, I have been there... and it isn't pretty.

Other essentials that I have used recently (and you may have noticed) in my recipes are the Egg Separator and  the SMART Ice Cream Scoop. I used both when I made Custard Style Strawberry Ice Cream.  Both handy and well made, I know I will be using all these tools all Summer long in my kitchen.


The beauty of this dish is all in the simplicity. One pot, the pasta cooks and veggies are added at the end of the cooking time. Then as everything gets drained, the sauce is created, it all goes back into the pot and gets seasoned and dusted with a generous helping of freshly grated Parmesan Cheese.

So easy!

Very few dishes.

Need I say more?


Light & Cheesy Pasta Primavera

You Will Need:

  • 1 cup vegetable stock
  • 8 oz. Gemelli pasta
  • 1 medium zucchini, halved lengthwise and sliced thin
  • 2 c. baby chard, roughly chopped
  • 10 oz. fresh shelled peas
  • 1 can garbanzo beans, drained and rinsed
  • 2 Tbsp. butter
  • 1 Tbsp. fresh lemon juice
  • zest of one lemon
  • 1/2 c. finely grated Parmesan
  • salt and pepper to taste
Begin by boiling your pasta, with vegetable stock added,  in a large stock pot according to the package directions. Just 3 minutes before the pasta is done, add the zucchini and chard to the pot. For the final minute, add the fresh peas and chickpeas. Reserve 1 cup of the cooking water and drain the pasta mix in a collander.

While the pot is free, add in the butter and melt gently over low heat. Turn off the burner and add the lemon juice and zest. Add the pasta mixture back to the pot and toss to coat. Add the Parmesan and season to taste.

Now, wasn't that easy?


Build Your Kitchen Drawer Sweepstakes

You know those great kitchen tools I shared earlier? Well, they are part of Good Cook's featured products for their upcoming Sweepstakes. There are many fun ways to win, make sure your kitchen drawer is well stocked and even enjoy 25% off everything on the goodcook.com site!

Sweepstakes runs June 2nd, 2014 - July 14th, 2014

Head over to goodcook.com during the sweepstakes period and create your own essential kitchen drawer filled with 15 items of Good Cook products and gadgets.


Keep an eye out for the "ADD ME" icon on products to add to your drawer. I hope you will add a few of the items I highlighted above...  And don't worry if you can't narrow it down, there will be featured Kitchen Expert Bloggers to help with pre-made drawers they suggest.

More fun on Facebook June 2nd - June 7th

Head over to the Good Cook Facebook page for 5 days of even more chances to win great kitchen items. There will be instant winners and everyday you have a new chance to submit your drawer of products for  a chance to win.

There are so many great prizes available and chances to deck out your kitchen drawer with soon-to-be new favorites. I hope you will join me starting June 2nd.


Andrea
Pin It

Tuesday, April 29, 2014

Taco Salad Time! Make it Fun with Good Cook inspired Tortilla Bowls

 I am part of the Good Cook Blogger Program and received these products for review. All opinions and experiences are my own. #‎goodcookkitchenexprt‬


There is so much going on during the Summer months that I usually have a few go-to meals I slip in almost weekly. Grilled chicken and vegetables, check. Waffles with fresh fruit and whipped cream, check. And then there is taco salad.

Even my kids go nuts for taco salad night. But, I have a secret. I plan to make our usualy taco salad night even more fun with these easy tortilla bowls. Baked, not fried, they only take 15 minutes to create. Doesn't everyone love to eat dinner in an edible bowl?


Taco Salad Bowls

You Will Need:

  • 6 flour tortillas
  • grapeseed oil spray
  • taco seasoning
  • 1 c. ground beef
  • 1 can kidney beans
  • 1 head of iceberg lettuce, shredded
  • 1 red bell pepper, sliced
  • sharp cheddar cheese, grated
  • grape tomatoes
  • avocado, sliced
  • sour cream
  • catalina dressing
Preheat the oven to 375 degrees.

Spray the inside of both pan halves liberally with grapeseed oil. Spray the tortillas lightly and dust with taco seasoning. Fit flour tortillas into the pan by ruffling the tortilla edges till they fit. Put the top on lightly, the pan mayb not close due to the tortilla's size. Don't worry.

Bake for 14 - 16 minutes or until the edges start to turn golden brown and the tortilla becomes crispy. Remove from the oven and let the shells cool on a wire rack.

While the tortillas bake, brown the ground beef and season lightly with salt and pepper. Set aside to cool and drain.

Assemble all the remaining salad ingredients and fill your salad bowl to suit your tastes. Top with sour cream and catalina dressing.

Enjoy!


Now doesn't that look yummy? These bowls are perfect portions for me... big eaters can grab an extra bowl if they want.


Okay, this is another fun and versatile Good Cook product. Use it for a savory dish, like these taco salads in edible flour tortilla bowls or whip up something sweet. I am planning to make a black bottom bowl to hold some homemade strawberry ice cream topped with vanilla rhubarb sauce.  Good Cook just happened to throw a Twister ice cream scoop in my box with the pan. Yeah, stay tuned for that fun...

My thoughts on the pan? I didn't have any trouble cleaning it up. Of course, I did use oil, so it wiped up easily, but I have had good success with easy cleaning and durability with all my Good Cook products.

You can grab your own Bake-a-Bowl pan set on the Good Cook site. While you are there, use CODE: BAKEBOWL to get a 25% off coupon to goodcook.com for the Good Cook Sweet Creations.

You can also find the Bake-a-Bowl at Bed Bath and Beyond.


Ready to dig in?

Be sure to check out all the other Bake-a-Bowl creations from Good Cook Experts and then be sure to enter to win a pan set for yourself.

You can follow Good Cook on twitter (@GoodCookcom) and see all the fun we are baking up in the kitchen by checking out the hashtags #goodcookcom and #sweetcreations.

What would you bake into bowl form?


Be inspired...


Giveaway Time!!
If you made it all the way down here, you must really want to win this pan for yourself. I have one pan to give away to one lucky reader. This giveaway will end 5/23/2014 at midnight PST. Winner must be 18, US only. Good luck!


Disclaimer - One prize per household for each Good Cook event. If someone wins on 2 or more blogs, they - or their family members - cannot win a second prize from another blog in the same event. If a household has won a prize in a Good Cook event, they can't win again for 6 months. If a household has won more than one prize in a Good Cook even, they can't win again for 12 months. Good Cook will confirm that winners are eligible and will disqualify anyone who has won more than once. Prizes ship from Good Cook and can take 8-10 weeks after the contest ends, unless otherwise stated. You must be 18 or older to win. US shipping addresses only. Good Cook reserves the right to substitute a prize of equal value if sufficient inventory is not available.

Andrea
Pin It

Friday, April 4, 2014

The Cutest No-Bake Chocolate Peanut Butter Crunch Bars

 I am part of the Good Cook Blogger Program and received these products for review. All opinions and experiences are my own. #‎goodcookkitchenexprt‬


My husband is the reason behind many of many of the  peanut butter chocolate goodies I post. It just happens to be his favorite combination. I don't mind it either, and I am more than happy to help him out. 

With Easter goodies in stores I have purchased more than a few fun items, cupcake papers and sprinkles, etc. but this Spring Bark Mold from the Good Cook Sweet Creations line, is my favorite already. There are several great ideas that have been swirling around my brain for the past two weeks.

Silicone molds like this are fast becoming my new obsession. I have used them for jigglers, roll-out based cookies and even no-bake bar cookies. This mold is oven safe and holds 12 cups. I even think this would be fun to use with roll-out pizza dough!


My mold arrived just this week, but I already knew what I was going to make. The chocolate/peanut butter bug had already hit me for Easter and these no-bake bars would be so easy to whip up... presenting a great way to show off the cute patterns with the chocolate topping.


Start out by melting the butter and peanut butter in a small saucepan. Whisk till smooth.

Then I enlisted my little kitchen helper to go crazy on a ziplock bag full of graham crackers. With a rolling pin and meat mallet, she reduced them to the perfect fine crumb consistency. It worked out perfectly.


While my daughter was beating up on those crackers, I started melting the chocolate. With just a little bit of coconut oil, and a whole lot of patience, I melted my baking discs. Go for the best chocolate you can find. It will be worth it.

I was also sent this adorable silicone spatula. There is also a cute zigzag patterned spatula on the Good Cooks site you can order, plus other Sweet creations spring cookware tools. It is the perfect way to bring a little Spring into your kitchen.


And because the peanut butter was super soft (don't worry, it gets chilled before serving!) I topped my pan with rice puffs, pressed down gently with waxed paper and then popped them in the fridge for a half an hour.

The silicone pan and spatula wash up easily... yes, even when using melted chocolate. If you want to add either of these items to your Spring baking tools  (or do some other Good Cook shopping), you can get a 25% off coupon to goodcook.com for the Good Cook Sweet Creations. Use CODE: SpringFling.


See how adorable they came out?? The silicone pan works like a dream. My bars popped out in one big sheet and I just needed to run my knife through the bars. Never fear, the bars were scored... I just filled my pan all the way up to the rim so I had to cut through the peanut butter layer.


No-Bake Chocolate Peanut Butter Crunch Bars

You Will Need:
  • 1/2 cup unsalted butter (1 stick)
  • 1 c. smooth peanut butter
  • 1 tsp. vanilla extract
  • 2 c. graham crackers, crushed (1 pack of 9 crackers)
  • 1 1/2 c. powdered sugar
  • 2 c. Ghirardelli Dark Melting Wafers
  • 1/4 tsp. coconut oil
  • 1 c. Rice Krispies cereal
In a small saucepan, melt the butter and peanut butter, stirring till the mixture is smooth. Take off the heat and stir in the vanilla. Set aside.

Add the melting wafers and coconut oil to a medium microwave safe bowl. Melt the wafers by heating at 15 to 20 second inervals at 60% power. Stir well in between heating. Stop before all the wafers have melted and stir till the chocolate is smooth. When it has started to cool, pour it into the mold and smooth out the top. Tap the mold gently on the counter to release any air bubbles. I did this a corner at a time.

In a ziplock bag crush the graham crackers with a meat mallet or rolling pin. Then add the powdered sugar to the bag and shake to mix. Empty contenct into a medium bowl and mix in the peanut butter mixture. Spread this over the top of the hardening chocolate mixture by the spoonful. Smooth the top and add the Rice Krispies. With a sheet of waxed paper, press the cereal down gently.

Cover with plastic wrap and chill for at least 30 minutes. Store in the refigerator and serve chilled.

What would you make in the Spring Bark Mold from Good Cook?

Check out these other great recipes using the Good Cook Spring Bark Mold.

Andrea
Pin It

Wednesday, February 5, 2014

Matcha Milk Bread Recipe + Make Ahead Bread Pre-Order Offer

 I am part of the Good Cook Kitchen Experts and received their products in the past. All opinions and experiences are my own. #goodcookcom, #goodcookkitchenexprt #makeaheadbread


I really enjoy making bread and have even baked some for a past Good Cook post. Did you catch my Meatloaf Sliders and Brioche Mini Buns using the Good Cook Whoopie Pie Pan?

Well, when I heard fellow Good Cook Kitchen Expert, blogger and bread baker, Donna Currie was publishing a bread book this year I wanted to help spread the word. When I heard I would need to bakes some bread to get the word out, well, you could say that I was happy to "rise to the occaision".  I'll get to her book and the pre-order offer in a moment, but first the bread.
This lady sure can bake!

Some of you know that I lived in Japan for 4 years and have a love of matcha. I am sure the appreciation comes from those weekly tea ceremony lessons, a cold room, a hard floor and a deep love of the hot bowl of frothy green tea. Also known as the only way to keep warm in the winter.

Now though I choose to seek out confections and other treats with the distinct matcha flavor. A green and earthy flavor that seems to have grown on me.

Given the chance to browse through Donna's blog and bread creations the Honey Matcha Bread caught my attention. Since this post is in honor of the baker herself, I thought I would share a Matcha Milk Bread recipe that reminds me of the kind of breads I used to buy at the bakeries in Japan. It uses a Tangzhong or "water roux" as the base. If you have traveled to Asia, you know that is what sets their bread apart.

Amazingly soft and delicate bread stays that way for several days. No hard crust, it toasts up well and is also lovely for sandwiches. I plan on enjoying my loaf with some butter and maybe drizzle of honey. It won't last long. The Tangzhong has to be made up ahead of time, but it super easy to do.

I made this recipe even easier by using the dough cycle on my beloved bread machine then hand forming it and letting it do a final rise in my Good Cook Loaf Pan before baking. I prefer the loaf shape and how the crust turns out in the pan.

Matcha Milk Bread

You Will Need:

  • 120 g. Tangzhong
  • 1/2 c. milk
  • 1 large egg
  • 2 Tbsp. honey
  • 3 Tbsp. butter, cubed
  • 2 1/2 c. bread flour
  • 1/2 tsp. salt
  • 2 tsp. instant yeast
  • 2 Tbsp. matcha powder
Make the Tangzhong - Take 1/3 c. bread flour and 1 c. water and whisk to dissolve. Heat in a small saucepan over medium heat, stirring constantly till it reaches about 150 degrees and thickens. Cool and refrigerate overnight.

The next day add all the ingredients except the matcha powder to your bread machine as directed by your machine's instructions. Put the machine on dough cycle and add the matcha powder and any additional flour needed at the point when you machine is ready for mix-ins. This is usually in the second knead cycle. The dough is very soft, but not sticky. 

After the dough cycle has ended, shape your loaf and let it rise once more in a pre-greased loaf pan. 

Brush the top of the loaf with a little egg wash. Bake at 325 degrees for 30 to 35 minutes. Let the loaf cool completely before slicing.

Enjoy!

_____________________________________________________


Now, if this bread recipe looks good, I am sure you are going to love fellow Good Cook blogger, Donna Currie's upcoming book - Make Ahead Bread - 100 Recipes for Bake-It-When-You-Want-It Yeast Breads. Pre-order now and recieve the Amazon Price Guarantee.

From the simplest dinner rolls to traditional croissants and all types of yeast breads in between, home cooks—even those short on time and skill–CAN bake fresh bread from scratch. How is this possible? By breaking the process into two separate steps, with the mixing and kneading done the day before and the baking done when the next day. And the best part? Not only does this make bread baking much easier to fit into a busy schedule, but it also results in a better finished bread product.
Good Cook wants to help spread the word and is offering a fun promo. Good Cook has a Free loaf pan offer with any pre-order purchase on Amazon (1 per book). Promo is good through February 28, 2014.  Just fill out this form to get your pan. 

You can also take advantage of the  25% off discount right now for any goodcook.com purchase by using coupon code BakeBread.

Now I hope that inspires you to get baking! What kind of bread do you want to try first?


Andrea
Pin It

Thursday, January 23, 2014

Chocolate Hazelnut Oatmeal Cream Pie Footballs - Game Day Treats

 I am part of the Good Cook Kitchen Experts and received these products for review. All opinions and experiences are my own. #goodcookcom, #goodcookkitchenexprt, #sweetcreations


Seems like I have seen so many adorable football shaped treats popping up everywhere in preparation for the SuperBowl. We watch it. as a family But I can't say that I am always watching for the game. I am more motivated by the commercials and the game day food.

I know, suprising, right? Me and food?

Well, Good Cook issued another challenge to food bloggers. They wanted to see what we could with "Big Game, Big Food". I decided a tradition like football watching needed a childhood favorite. Oatmeal Cream Pies immediately came to mind.

But, that wasn't good enough. I wanted chocolate, too.


So I pulled out all the Oatmeal Cream Pie recipes I could find... then decided to add in some Hershey's Chocolate Hazelnut Spread I already had in the pantry. It took a few test runs to get a cookie that was pliable enough to deserve to be called an Oatmeal Cream Pie, but would also hold a hand-formed football shape.


Mmm...

I always eat the mistakes.


Luckily I nailed it. Adding in some of the spread to marshmallow fluff was easy. Then I decorated my cookie tops and made the sandwiches. I'm ready coach.

As always, I used some Good Cook products to help create my treats. I used their Sweet Creations mixing bowls, cookie cutters, a cookie dropper, high temp spatula and flex cookie turner. This has become my usual cookie equipment list. Other than my stand mixer, it is all I need to whip up a great batch of delicious cookies.

Want to try these items, too?  Use code: BigGame48 on the goodcook.com site to receive a 20% off discount.


Chocolate Hazelnut Oatmeal Cream Pie Footballs

You Will Need:

  • 1 1/2 c. flour
  • 1/2 c. old fashioned oats
  • 1 tsp. cinnamon
  • 1/2 tsp. salt
  • 1/2 c. unsalted butter, at room temperature
  • 1/2 c. granulated sugar
  • 1/2 c. packed brown sugar
  • 1 medium egg
  • 1 tsp. vanilla
  • 1/2 c. Hershey's Chocolate Hazelnut spread
Chocolate Fluff Filling
  • 1/2 c. unsalted butter, at room temperature
  • 3/4 c. powdered sugar
  • 1 pinch of salt
  • 7 oz. marshmallow fluff
  • 1/2 c. Hershey's Chocolate Hazelnut spread
Preheat the oven to 350 degrees.

In a medium bowl, mix the flour, oats, cinnamon and salt. Set aside.

Cream together the butter and sugars. Then add the egg and vanilla, scrape down the sides of the bowl. Then add the chocolate hazelnut spread and mix until incorporated. On low, stir in the dry ingredients.

On Silpat or parchment paper, place a heaping cookie scoop of dough. Gently round the ends so they are football shaped. Bake for 9 - 10 minutes. If the cookies loose their shape, while still warm, pinch the edges gently. Allow to cool on the cookie sheet for 5 minutes before transfering to a rack to cool completely.

Allow to cool completely before decorating or filling.

For the filling, cream the butter, powdered sugar and salt together. Whip in the marshmallow fluff and reserve 3 tablespoons for decorating the tops. Add the chocolate spread into the remaining mixture. Mix well. Spread this over the underside of one cookie, top with another cookie and then using a piping bag with the reserved white marshmallow mixture, decorate like footballs.

Grab a glass of milk and enjoy!


What will you be making for game day?
Andrea
Pin It

Friday, December 13, 2013

For My Husband - Peanut Butter, Oatmeal, Chocolate Chip, Butterscotch Cookie Recipe

 I am part of the Good Cook Kitchen Experts and received these products for review. All opinions and experiences are my own. #goodcookcom, #goodcookkitchenexprt, #sweetcreations


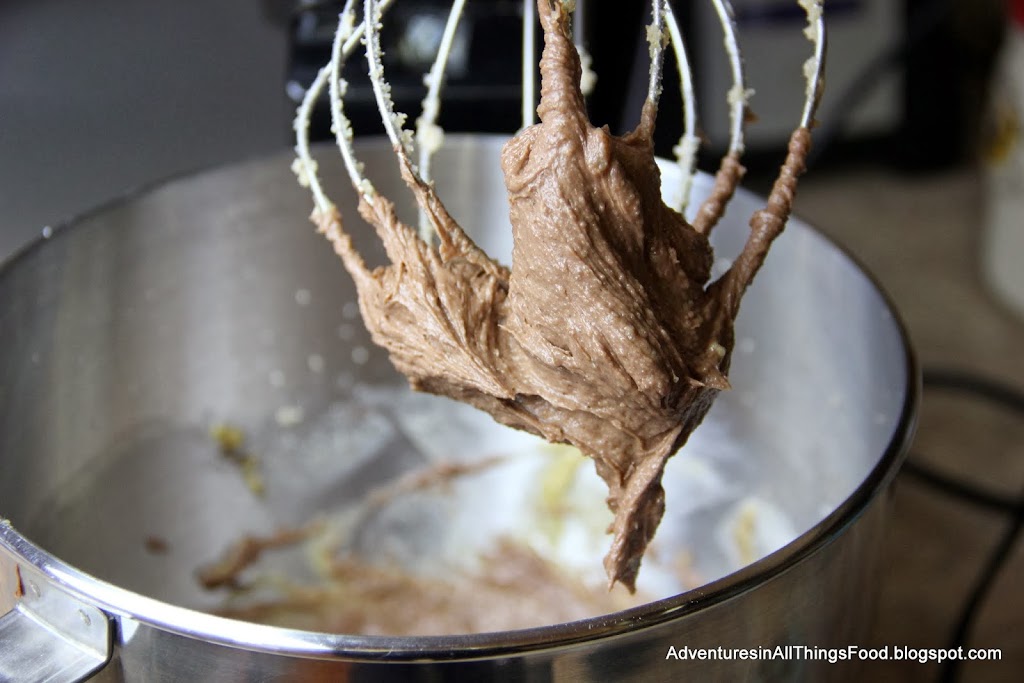
Though the holidays make me think of cookie baking, this is a cookie recipe my family enjoys all-year-round. I was first introduced to these weighty little wonders in college. I remember how my husband and his roommate all but burned out the motor of their little Kitchen Aid trying to mix these.

Now, you can't mix them by hand... unless you have Incredible Hulk forearms. Basically they have a base of peanut butter and quick oats that make the dough very stiff.

But they are amazingly delicious.

The recipe actually came to me from my Mother-in-Law who used to make them for her boys. Packed in lunch, they could eat one during lunch and save another for the long bus ride home.

Cookie baking today was just for nostalgia. It was prompted by a very generous box of cookie baking supplies from Sweet Creations by Good Cook.


All from the Sweet Creations line, there were cookie sheets, Sweet Creations mixing bowls, cookie cutters, a cookie dropper, high temp spatula and flex cookie turner. Basically everything necessary to get baking cookies!


All simple ingredients in these cookies. But you will notice an absence of flour. Don't worry... they turn out just fine.


This dough will give your stand mixer a workout though. Keep an eye on it because it might overload your machine. The basic 5 quart Kitchen Aid can barely get through the mass... but my larger mixer has no problem.


I had a blast using my new Sweet Creations tools. The cookie scoop was the perfect way to achieve uniform cookies. I like these cookies to be large so I used two scoops per cookie.

I also found the cookie turner very handy for moving this large cookies. Even after cooling on the sheet before moving, they are soft and could break easily if I tried to transfer them by hand.

And of course I loved trying out the shiny new cookie sheets. I had two of the large 12" x 17" cookie sheets - perfect to help me get through this large batch of cookies. The sheets are aluminum so they won't rust but have even baking.

Like the products I used? Use code: COOKIES to get  a 5% off coupon to use on any Sweet Creations products on goodcook.com.


If you have a chance, stop by the Good Cook Facebook page and there will be a place to vote for my cookies. LIKE my cookies and you will be entered to win one of 25 cookie kits from Good Cook. Vote from Dec 19 to Dec 31, 2013. Good luck!!

Ready to get baking?


Peanut Butter Oatmeal Chocolate Chip Butterscotch Cookies

You Will Need:

  • 1/2 c. butter (1 stick), at room temperature
  • 18 oz. of crunchy peanut butter
  • 1 1/2 c. sugar
  • 1 1/2 c. brown sugar, packed
  • 4 large eggs
  • 1 tsp. vanilla
  • 1 tsp. cinnamon
  • 6 cups quick cooking oats (uncooked)
  • 2 1/2 tsp. baking soda
  • 1 c. semi-sweet chocolate chips
  • 1/2 c. butterscotch chips
Preheat the oven to 350 degrees.

In a stand mixer, beat the butter and peanut butter till fluffy. Gradually add in the sugars. Then add in the eggs, one at a time and vanilla.

In a large bowl measure out the oats, cinnamon, and baking soda. Mix. Stir this into the wet ingredients. Once well mixed, mix in the chips.

Drop onto a cookie sheet by heaping tablespoon full. I used the Sweet Creations Cookie Scoop and used two scoop fulls per cookie. Bake for 9 - 10 minutes. Cool on the cookie sheet for 5 minutes before transferring to a wire rack to finish cooling.

This recipe freezes very well. Freeze formed balls to bake fresh later as needed.


Enjoy!


Andrea
Pin It