Showing posts with label Silhouette Challenge. Show all posts

Monday, May 9, 2016

Summer Strawberry Tote DIY - With the Silhouette Mint!


Are you looking forward to summer?

Are you ready to haul all of your necessities around? There are the glasses, a reusable water bottle, sunscreen and either a tablet or good book... but, what will you be using to lug it all around in? Whether you are popping out for some groceries, heading to the berry patch for U-Pick, or just taking your kids to the park, a fun and personalized tote is perfect for summer.

This month for the Silhouette Challenge, I wanted to use my newest addition from the Silhouette line, the Silhouette Mint. The Mint is a stamp lover's dream! With thermal printing, I can design a stamp in the Mint Studio on my computer, print it onto a stamp blank, then use their line of inks to stamp my design.


For my daughter's Valentine's Day cards we created a custom stamp with her image. I just love how it turned out and it made her cards unique and memorable.


But only recently did I hear you could use the stamps along with Silhouette's ink to stamp on fabric.

That was a really exciting moment!

So when I was planning out my "summer" themed Silhouette Challenge project, I knew it had to involve fabric and stamping.

Summer here on the farm starts with strawberry season. Right now we are up to our ears in planting and transplanting vegetables, even cutting the year's first hay, but the farm really comes alive with the first strawberries. This year we have been lucky enough to already have found a few early berries... those hidden gems are always the best!

To commemorate our favorite red berries, I wanted to create a simple stamped tote. It is the perfect bag to haul my water bottle, book of the week, as well as all my other necessities into the strawberry patch while I pick. I will probably also take it along to the park, or the beach and personalizing it makes it all mine.

Let me show you how easy it was to create.

First start by choosing or importing your design. I purchased this simple strawberry from the Silhouette Design Store. It doesn't matter whether it is in color, or already black and white. It is easy enough to preview and adjust as necessary like I did with the photo of my daughter above. Simple graphics are much easier to use for creating a stamp though.

Choose the size stamp you want to create and the software will change your working area. That white square is a 30 x 30 mm stamp size.


I played around with a few different strawberries till I found one that was easy to modify. Please tell me I am not the only one who buys several similar images and plays around forever till I get it ...just, right.  I decided to separate the stem and strawberry for other projects. 

I just used the eraser tool to delete the portion I didn't want. You can add different color ink to the different sections if you want.  I wanted the parts separate, and I was worried about the ink bleeding around the edges of the stem.


At any time you can click on stamp filters to see what your image will look like and play around with different options. I used the comic outline for this project.


After your image is ready, when you go to create your stamp, the software automatically mirror images the design for you. I really enjoy this part being automatic. I can't tell you how many times I have messed up a project because I forgot to reverse the lettering!

So in the case of my "Berry Nice", I used the curved text option to create it...


Then when I clicked to send it to the Mint, it gave me the mirror image of the text so my stamp would stamp the words correctly.

This stamp is a 30 x 60 mm size which was perfect for my saying.


If you already have used a Silhouette Mint, you know how easy it is to print. Once you send it to the machine, you feed the stamp blank through the back and it stamps it and rolls through.

Break open the sheet and peel off the printed stamp. Then adhere it to a stamp mount which slides onto a changeable stamp grip. Then you can stamp a label to mark your stamp lid for storage.


Once the stamp is ready, I covered my image in Silhouette Mint Ink. Let it soak in completely for about 10 minutes, stamped off the excess ink on scratch paper and then went about stamping my project area.

I picked up a simple canvas tote. I always have a stash of these in the car for grocery shopping or just collecting our "stuff". Yeah, a family of 5 always has more stuff than I have room for in my hands.


Through trial and error I stamped and stamped and created my tote. Not a masterpeice, but it is all mine. 


So, let me know down in the comments below what you thought of my "Berry Nice" tote as well as what you would put on your own stamped summer tote. I would love to hear how you would personalize yours!

Want to Check Out More Silhouette Projects?

I've got two great Silhouette treats for you today! First off, my Silhouette Challenge buddies and I are all sharing projects on our blogs today, so peruse the projects below for a wealth of Silhouette inspiration!
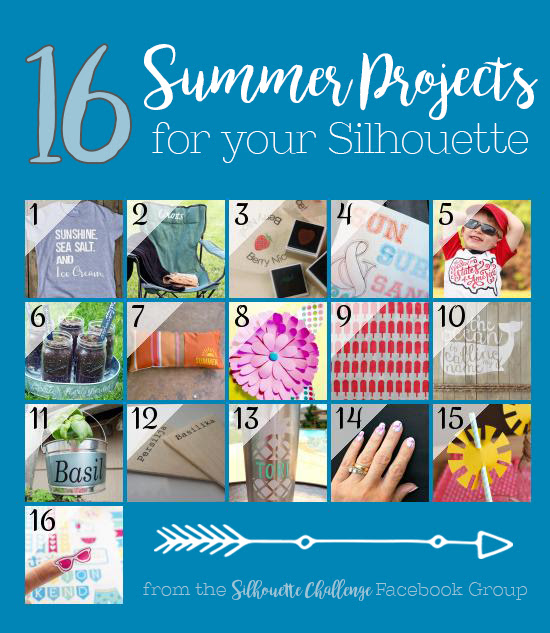
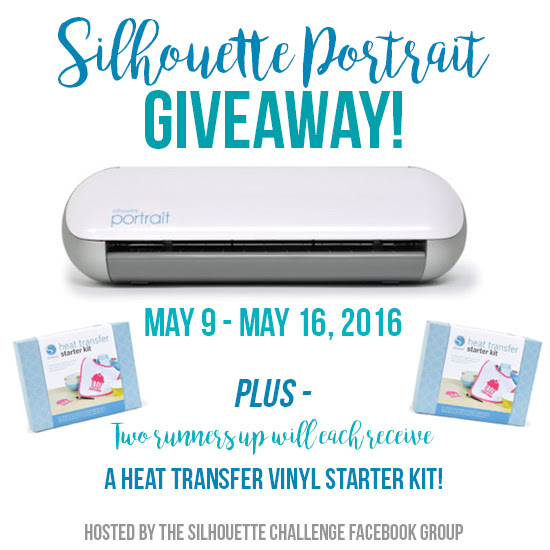
Sunshine. Sea Salt. And Ice Cream Shirt Personalized Lawn Chair DIY Summer Strawberry Tote DIY - With the Silhouette Mint! How to Use Multiple Colors of Silhouette Sketch Pens Patriotic Hand-Scripted USA Shirt Herb Garden with Personalized Tin Outdoor Pillow for Summer How to Make Huge Paper Flowers Make A Half Moon Printed Pouch DIY Nautical Pallet Sign Vertical Herb Garden Ladder Kyltit yrttipenkkiin / Labels for herbs Pineapple Cup Decal DIY Flamingo Nail Art Sunshine Straw Toppers Summer Planner Stickers 1. Sisters, What // 2. Small Stuff Counts // 3. Adventures in All Things Food // 4. Creative Ramblings // 5. Where The Smiles Have Been // 6. Curly Crafty Mom // 7. Architecture of a Mom // 8. Create & Babble // 9. HaberdasheryFun // 10. Coral + Mint Design Co. // 11. Designed Decor // 12. Tehtaiskö nyt? // 13. Tori Grant Designs // 14. Morena's Corner // 15. It Happens in a Blink // 16. unOriginal Mom   Silhouette Portrait Giveaway   And I've saved the best for last! Silhouette America has graciously sponsored our giveaway of a Silhouette Portrait! One lucky grand prize winner will receive their very own Silhouette Portrait, and two runners up will each receive a Heat Transfer Vinyl Starter Kit. (If you already own a Silhouette, just think how great a gift this would make for a friend!) To enter: just complete the entries in the Rafflecopter widget below. You have 18 potential entries, which means a lot of winning power. So, hurry up and enter! (This giveaway runs from 8:00 am on May 9 until 11:59pm on May 16, 2016, and is open to readers with a US mailing address.) a Rafflecopter giveaway  


Andrea
Pin It

Monday, March 14, 2016

DIY Easter Egg Shirt - Silhouette Heat Transfer & Rhinestones


With Easter coming up early this year, I wanted to make my daughter a special holiday shirt that could be finished in an afternoon. Of course, I also wanted to try something new. Can you believe that I still haven't tried embellishing with rhinestones yet?

This year I am back participating in the Silhouette Challenges, but this year there will only be 4 group posting dates. Okay, I am a little bummed, but I am excited to play around more on my own time and hope to post those projects as well. This month's challenge just happened to be with fabric. 

Oh, be sure to stick around for the whole post, there is an amazing giveaway near the end... plus more great inspiration from my fellow Silhouette Challenge members. :)


Okay, back to the shirt.

As much as I love my daughter in Easter dresses, she is more of a rough and tumble girl. She would much rather have fun and play hard in a holiday shirt. I wanted to add a little sparkle to her shirt with both glitter heat transfer material and a few well placed rhinestones.

For this project you will need:
  • Heat Transfer Material (I chose white with glitter)
  • Rhinestones (I used pink, blue, yellow, green, black and clear)
  • Iron
  • thin towel or pillowcase to place over design during ironing
  • Easter Egg Cut Files - from the Silhouette design store
  • Pick-Me-Up Tool *optional, but very handy!

I don't have a cut file to share with you for this project. I found 2 different designs that I loved in the Silhouette Design Store. They were each $0.99. I used this set of 3 Easter Eggs, as well as this Easter Egg Card design.


So I downloaded the designs, brought them into the software and then deleted the layers or items I didn't need. I didn't want to do a lot of extra weeding or aligning, so I wanted to weld the 3 egg shapes together.


To weld, so the objects will be cut out as 1 image, overlap the designs, then select all three eggs. The menu at the top right is where you will find the modify menu. This drop-down menu has the weld function.


Once all the images are connected, cut out the heat transfer material as usual. I always make sure to double check my cut setting and blade depth to prevent headaches later.
.
Applying the heat transfer material is super easy, especially when it is only one solid piece. Once ironed on, it was time to embellish my Easter Eggs with a little color. Tulip has a great variety pack of heat-set rhinestones if you don't have a stash already.

Also, this was my first time trying out the Pick-Me-Up tool. It was awesome! One end is sticky... just tacky enough to grab and hold those rhinestones, but not too sticky so it wouldn't let go. The other end has a wedge that was perfect for turning over flipped rhinestones.

Please note, I chose not to create a rhinestone template on the Silhouette because this project didn't use many rhinestones and their setting didn't have to be exact. That is next on my project wish-list. :)

To set the rhinestones, I placed a pillowcase over the design and gently pressed straight down with my iron. Then I turned the shirt inside out and ironed it again from the other side.


The finished Easter shirt is the perfect balance of fun and sparkle! Very fitting for my daughter. Do you have someone in your life who would enjoy a sparkly Easter Egg Shirt?


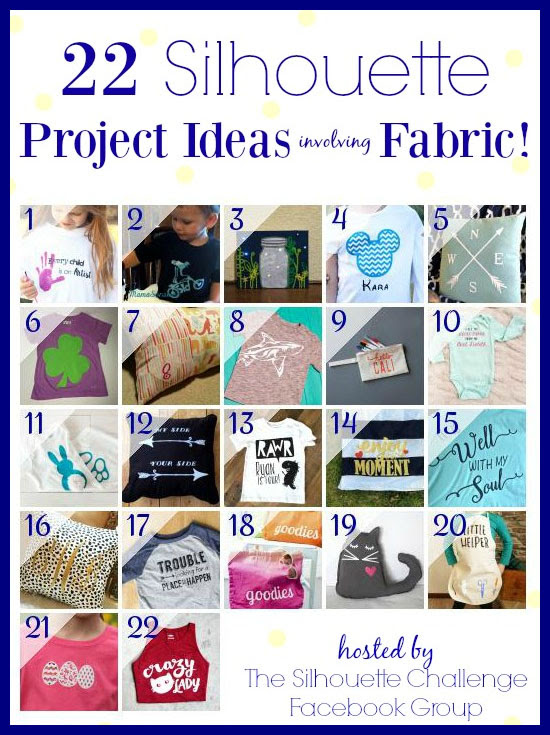
Thanks for stopping by! I hope you enjoyed my project. Be sure to check out all 22 project ideas below. Also be sure to enter the great giveaway at the end of the post. 

Want to Check Out More Silhouette Projects?

My Silhouette Challenge buddies and I are all sharing projects on our blogs today, so peruse the projects below for a wealth of Silhouette inspiration!

Art Party SmocksCustom Daredevil Shirt ~ Silhouette Blog HopDIY Lightning Bug Wall Art with LightsDIY Chevron Mickey Mouse Shirt with Glitter HTVDIY Nautical Pillow Cover + A GIVEAWAY!Recycling Tee Shirts - St. Patty's Day Style! Appliqued Initial Heart PillowWrap-Around Shark ShirtSew A Shopping Tote Into A Zipper Pouch3 Creative Onesies for Baby Girl & Free Cut FilesPom Pom Tail Bunny OnesieFreezer Paper Stenciled Cushion with a Giveaway!Rawr! Dinosaur Birthday Shirtcustomize your Picnic BlanketIt is Well With My Soul T-Shirt DesignMonogrammed Envelope Pillows + Giveaway {The Silhouette Challenge}Toddler Trouble Shirt with free cut fileDIY Ombré ToteUpcycled t-shirt cat... Meow!Little Helper Stenciled Kids ApronDIY Easter Egg Shirt - Silhouette Heat Transfer & RhinestonesDIY: Crazy Cat Lady Shirt + Free Cut File
.
1. Cutesy Crafts // 2. Mama Sonshine // 3. Morena's Corner // 4. Simply Kelly Designs // 5. Coral + Mint Design Co. // 6. A Time For Seasons // 7. Architecture of a Mom // 8. Where The Smiles Have Been // 9. Haberdashery Fun // 10. The Thinking Closet // 11. The Crafting Nook // 12. Get Silvered // 13. Tori Grant Designs // 14. From Wine to Whine // 15. Create & Babble // 16. Curly Crafty Mom // 17. unOriginal Mom // 18. The Small Stuff Counts // 19. The Experimental Home // 20. Creative Ramblings // 21. Adventures in All Things Food // 22. Minted Strawberry

Heat Press Giveaway


 And I’ve saved the best for last! Pro World Inc is giving one lucky reader a Heat Press Valued at $300! Pretty sweet, huh? To enter: just complete the entries in the Rafflecopter widget below. You have 26 potential entries, which means a lot of winning power. So, hurry up and enter! {This giveaway runs from today through Monday, March 21st at 11:59p eastern and is open to anyone 18 years of age or older with a lower 48 U.S. mailing address. You can read the rest of the terms and conditions in the widget below.} a Rafflecopter giveaway


Andrea
Pin It

Monday, November 9, 2015

Glittery Chipboard Gift Tags - November Silhouette Challenge


I know, I know... it was just Halloween and it is not even Thanksgiving yet, but I am already looking ahead and crafting to Christmas. I was really excited to jump back into the Silhouette Challenge with these simple and fun chipboard gift tags. November's theme is for $5 and Under Projects with a bonus challenge to use glitter. Getting started early on homemade wrapping solutions seemed like a great place to start.

I was able to accomplish both the price limit and the glitz with these easy jumbo gift tags. I was also able to finally use the double-sided adhesive, I have had in my stash, on a project. I am not sure why I waited so long to try it out. The adhesive was very durable and worked well for the intricate snowflake shape pictured above. I always worry about tearing complicated images, but this stuff was very easy to work with.


Luckily, this project only requires a few supplies:

  • Chipboard
  • Gift Tag outline for the Silhouette or Punch
  • Double-Sided Adhesive
  • Glitter
  • paint brush *helpful but not necessary
  • spatula *helpful but not necessary
  • Baker's twine
  • scissors


Why jumbo tags? Who says the tag doesn't matter when it is homemade and covered in glitter, right?  I wanted these to really pop and make a statement on our gifts this year.


I started by cutting out my chipboard gift tags. Then I selected 4 images from my library that would fit my Christmas theme as well as look darling in glitter. Big, simple outlines work well with the adhesive and the glitter.


Before cutting, I selected the double-sided adhesive paper and adjusted my blade as directed.

Weeding this project was easy, the hardest part was separating off the yellow backing before fixing them to my chipboard tags. I used my Silhouette spatula to help separate the layers.


You can see here that my most complicated design was the Christmas tree since I used 3 different colors of glitter. I started by sticking down the outline first, covering it in glitter, then adding the next piece and another color of glitter, etc.

I used a brush to make sure glitter was covering all the exposed adhesive before I shook off the excess glitter. It did a great job of getting the glitter in an even layer, especially around the edges of the image.


I also created some monochrome tags like this reindeer in gold, a Christmas star in blue and a snowflake in white.


This snowflake photo doesn't quite do the tag justice as the image stands out better offscreen.


And here are all 4 of my finished designs. What do you think?

So, how would you design your own glittery gift tags?

Want to Check Out More Silhouette Projects?

My Silhouette Challenge buddies and I are all sharing projects on our blogs today, so peruse the projects below for a wealth of Silhouette inspiration!

DIY Birthday BibSimple and Stunning Winter ArtGlittery Chipboard Gift Tags"Come Thou Fount" Stenciled Burlap Table RunnerHappy & Vibrant Greeting CardsBunco Water Bottle - White Elephant GiftMonogrammed Christmas OnesieBeautiful Thanksgiving Decor for Under $5Wine Sippy Cups with Funny SayingsThrifted Jewelry Box MakeoverDIY Decorative Vinyl Christmas Gift JarHarry Potter "Free Dobby" Odd Sock CollectorReindeer Candle Hurricanes with Washi Tape PlaidStar War Paper Play ShipsGlitter & Paper Christmas BannerUpcycled Measuring Cup
1. From Wine to Whine // 2. Creative Ramblings // 3. Adventures in All Things Food // 4. unOriginal Mom // 5. Small Stuff Counts // 6. Alayna's Creations // 7. Single Yet Married Mom // 8. Comfort and Yum // 9. Tori Grant Designs // 10. Cutesy Crafts // 11. The Crafting Nook // 12. Whatcha Workin' On? // 13. Architecture of a Mom // 14. Havalah // 15. Create & Babble // 16. A Time For Seasons
Andrea
Pin It

Monday, May 11, 2015

Etched Oregon Swing Top Bottle - May Silhouette Challenge

Create an etched glass bottle for homemade strawberry lemonade, a great hostess gift for Summer.


One of my favorite parts of Spring is the coming of the local strawberries! Sweet and juicy berries are already dotting the strawberry fields here in Oregon and pretty soon the hot afternoons will start to smell like fresh strawberry jam.

This time of year, I love to create a simple and fresh strawberry lemonade.

I thought it was about time to profess my love of both my state and strawberries by etching a state outline into a Swing Top Bottle of my homemade lemonade just perfect for sharing with a good friend. Start with a sweet little swing top bottle.


I found this one at Michael's


Then it is time to break out the Silhouette, etching cream and other simple supplies. Do you remember my "Hello Sunshine" etched glass mug tutorial last Spring? This is a similar project and just as much fun.

Don't forget to grab a pair of protective gloves, the etching cream is caustic stuff.

Create a stencil in the Silhouette Design Studio. For this project I searched for an outline of my state and then uploaded the image into my program and used the trace function to create my own design. With a heart added in the middle, I was ready to go.


Take care when transferring your stencil. If it is not a single object and requires alignment, be sure to use transfer paper.


Then I put in a little extra time smoothing down the corners. I ended up with a little bleed under the edges, but I liked the rustic look of how it turned out.


Then comes etching time! I dabbed on some etching cream and then scraped off the excess. After just 30 seconds it was time to wash off the cream before removing the stencil. It is always fun to see exactly how it turns out.


It is subtle, but noticeable. I really like how it turned out. Now, I am ready to share my favorite way to cool off this time of year.
Now that you know how easy it is to etch glass, what would you like to make?

Want to Check Out More Silhouette Projects?

My Silhouette Challenge buddies and I are all sharing projects on our blogs today, so peruse the projects below for a wealth of Silhouette inspiration!

DIY Personalized NotebookDIY Kentucky Bourbon Etched Glass Set: Perfect Gift for Dad!Silhouette Monogram Ideas - Easy Monogram PhotoDAD Accordian Fold Father's Day CardEtched Oregon Swing Top Bottle  - May Silhouette ChallengeLeather BookmarkDIY Wedding GiftEtched Glass Vase with a SilhouetteHow To Make Etched Glass Tile CoastersSimple Handmade Gifts for Under $10.00Family Tree Frame with VinylMother's Day Etched Glass Terrarium: The Perfect DIY GiftWood Monogram Wire BraceletThe Art of the Etched Casserole Dish: Your Questions Answered!Faux Chalk Mason Jar GlassDelicious! Any More? An etched Glass plate
1. Weekend Craft // 2. Where The Smiles Have Been // 3. Confessions of an Overworked Mom // 4. Simply Kelly Designs // 5. Adventures in All Things Food // 6. Sisters, What! // 7. Create & Babble // 8. Creative Ramblings // 9. Practically Functional // 10. Briick by Briick // 11. My Paper Craze // 12. DIYJustCuz // 13. Made in a Day // 14. The Thinking Closet // 15. Architecture of a Mom // 16. Get Silvered


Andrea
Pin It

Monday, March 9, 2015

Creating Labels with Sketch Pens - March Silhouette Challenge


Last week I shared my recipe for this luxurious Green Tea Sugar Scrub. Today I want to share how to use your Silhouette and Sketch Pens to create an easy label. You will find even more inspirational posts for this theme at the bottom of this post. Be sure to check them all out.

This month's Silhouette Challenge theme is Word Art/Typography and the added challenge was for the Sketch Pens, which I already love!  Last year I created an inspirational Ballerina drawing with sketch pens for my daughter. She loved it! That was my first attempt with the pens and this time around I was more confident in how they work.

To make my labels I used Silhouette printable white sticker paper and the set of 24 sketch pens.

I actually first tired using the sketch pens on silver foil to make my labels, but the ink didn't stick to the slick surface. Sketch pens work very well on regular paper or a more porous surface.

Since I used the Silhouette brand sketch pens, I didn't need any special holders. All you need to do is take out the cutting blade, and these pens will slip right in.


When using sketch pens, be sure to get them started on scratch paper before trying to print out your work. I found one or two pens that needed to get the ink flowing or had a bubble in them. So try them out before slipping them into your Silhouette machine.

 I started with my wording. I wanted two different colors, the main name in black and the other script in green. This means when I set up my project, I put the words in different layers.

Why layers? Well, you will be working with one color at a time and afterwards I still wanted my cut lines available. This means I used 3 layers and could send each layer to the machine one at a time, changing out the pens or blade as needed.

The red highlighted words show where I planned to use my green sketch pen.


After sketching out the lettering then I turned off those layers and selected the outer cut layer. I inserted my blade back in the machine and selected the Silhouette Printable White Sticker Paper for blade depth suggestions.


I love using the sketch pens on projects like this because I have had numerous headaches with print to cut and registration marks. Sometimes it is fun to have another option.

You can also use non Silhouette brand pens in the Silhouette machine, I just ordered a set of pen holders so I can explore that option. The possibilities really are endless!

Want the recipe to make your own Green Tea Sugar Scrub? It is even easier than making the labels. And weren't those easy? Check out my Green Tea Sugar Scrub post.


But it is even better with the fun Sketch Pen label . I think this make a great Mother's Day gift. Or what about a fun green treat for St. Patrick's Day?

Want to Check Out More Silhouette Projects?

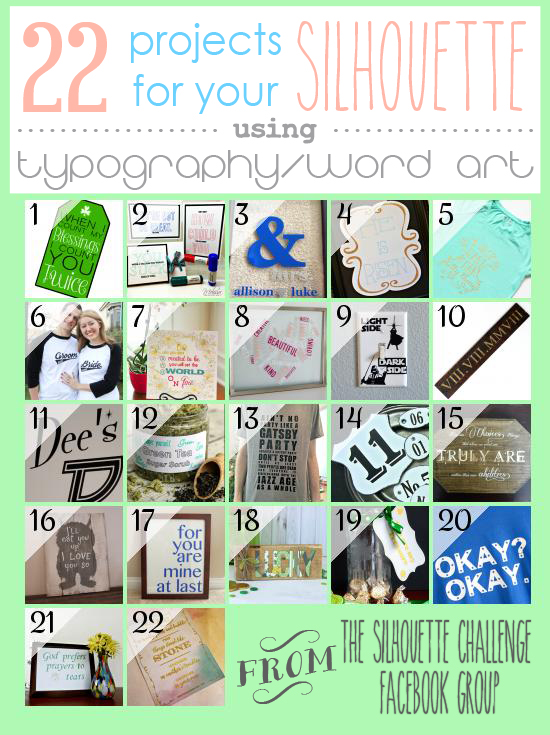
My Silhouette Challenge buddies and I are all sharing projects on our blogs today, so peruse the projects below for a wealth of Silhouette inspiration!

St. Patrick's Day Gift Tag with {FREE Cut File}The Fine PrintMr. and Mrs. Word ArtHe is Risen Easter Silhouette ArtDIY "Make Pretty Things" Graphic TeeBride & Groom Baseball ShirtsUsing Sketch Pens (and Markers!) For BeginnersHeart Shaped Vinyl Word ArtStar Wars Light Switch - Silhouette ChallengePallet Wood Roman Numeral Anniversary Signhow to cut LARGE Vinyl DecalsCreating Labels with Sketch Pens - March Silhouette ChallengeAin't No Party Like A Gatsby Party T-ShirtDIY Faux Enamel TagsHarry Potter Word ArtWhere the Wild Things Are Pallet Sign"At Last" Framed Vinyl Word ArtLucky Pallet SignSt. Patrick's Day Etched Glass Jar GiftThe Fault In Our Stars Inspired Shirt - Okay? Okay.Silhouette Craft Projects: Framed Irish ProverbSketch out an Inspiring Quote
1. My Paper Craze // 2. The Stamp Doc // 3. Peanut Life Adventures // 4. Creative Ramblings // 5. Pitter and Glink // 6. The Thinking Closet // 7. Single Yet Married Mom // 8. unOriginalMom // 9. Sisters, What! // 10. Where The Smiles Have Been // 11. From Whine to Whine // 12. Adventures in All Things Food // 13. Practically Functional // 14. Patina Paradise // 15. Please Excuse My Craftermath... // 16. Weekend Craft // 17. Two Purple Couches // 18. Ribbons & Glue // 19. TitiCrafty // 20. Simply Kelly Designs // 21. Confessions of an Overworked Mom // 22. Get Silvered
Andrea
Pin It